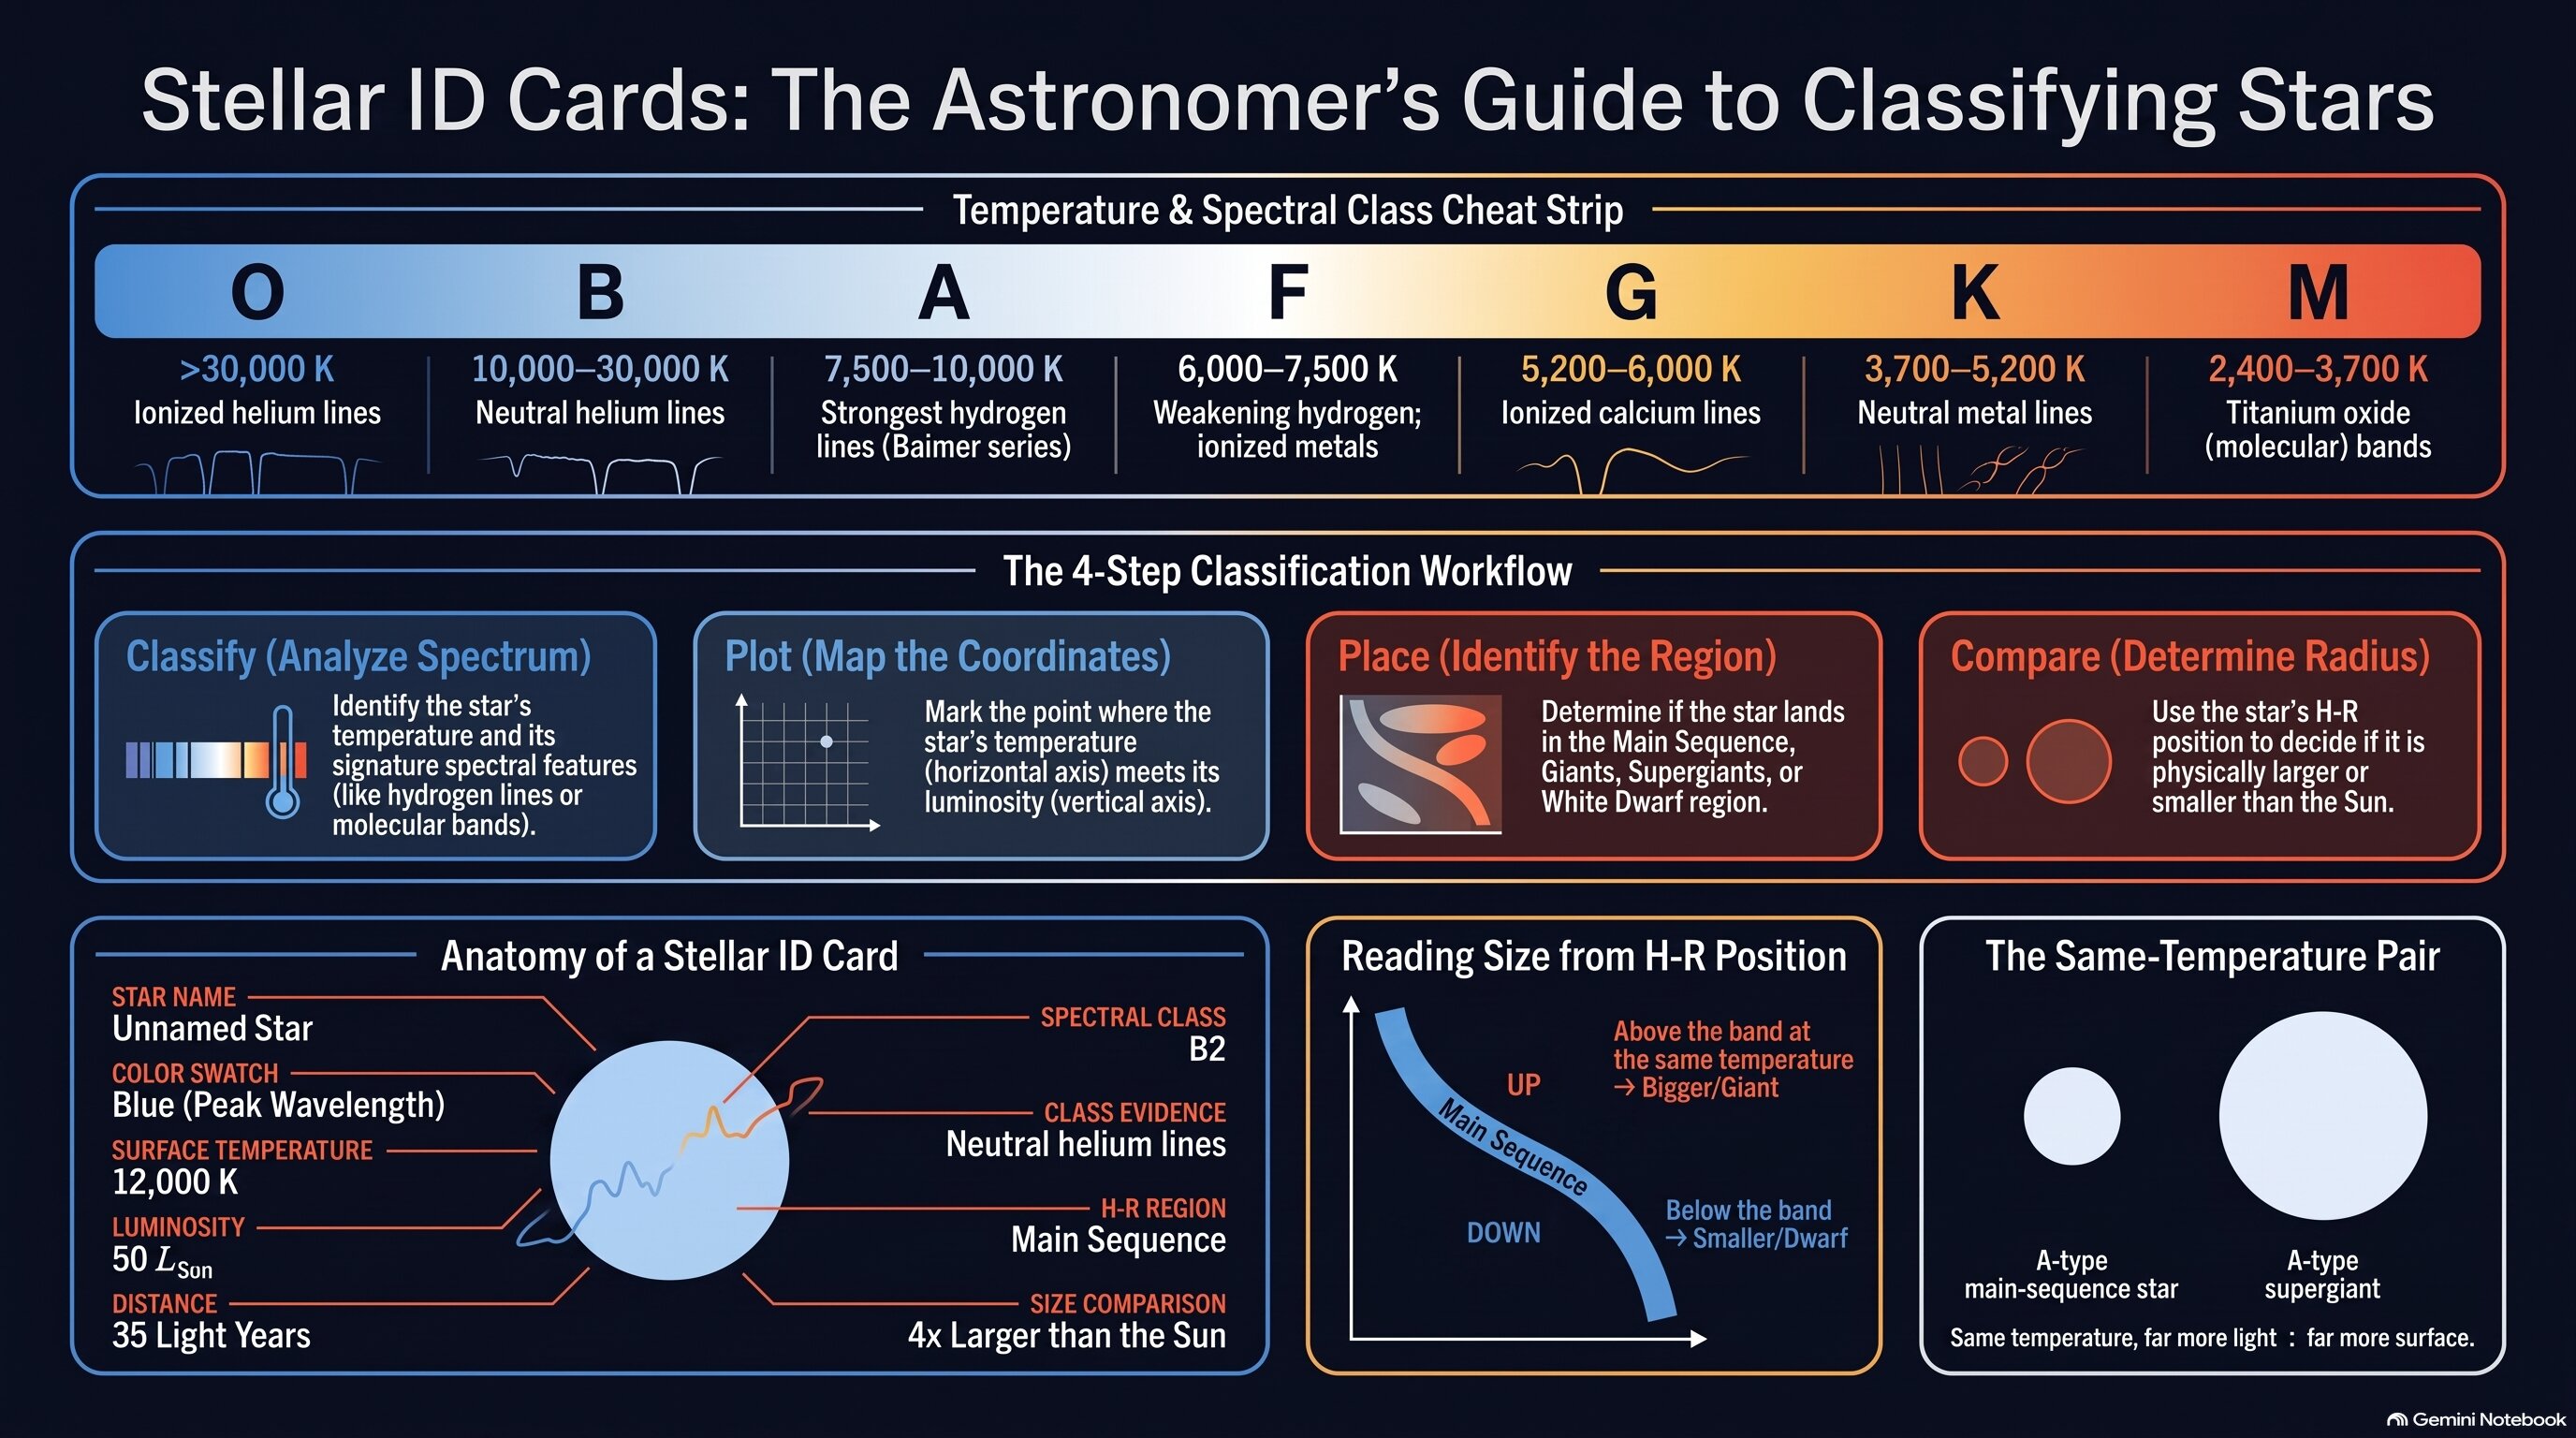
Quick reference for building an ID card: classify, plot, place, and compare.
🪪 Plot Summary
You've learned to read a star's spectrum and to place it on the H-R diagram. Now you'll do both for real stars — and keep the results. You'll pick ten stars from a roster of sixteen, each one listed with its measured temperature, luminosity, color, and the features in its spectrum. For every star you'll build an ID card: its spectral class and the evidence for it, its spot on the H-R diagram, the region it belongs to, and whether it's bigger or smaller than the Sun. Then you'll plot the whole deck on one master diagram. Nothing here is new — it's the first time you'll put all of it to work at once.
What you'll do in this project
- Pick ten real stars from a roster of sixteen — from Proxima Centauri next door to Deneb, some 2,600 light-years away.
- Classify each one by spectral type, and back up every letter with evidence from its temperature and spectrum.
- Plot all ten on a single H-R diagram and name the region each one lands in.
- Decide whether each star is bigger or smaller than the Sun — straight from where it sits on the diagram.
- Find a same-temperature pair in your deck and explain what their difference in brightness really means.
Why it matters
This deck is your reference for the rest of Unit 4. In Project 4.2.3 you'll trace a star's whole life across the H-R diagram, and in Problem 4.3.1, What Happens to This One?, you'll diagnose an unnamed star from exactly the kind of data on these cards.
✅ Self-Check Before You Roll On
Check off each item as you get there. These aren't grades — they're your own signal.